- Go to the site where you are using the Managed Navigation
- Go to a page that has an item you would like to add to the global navigation
- In my example, I will add the “Documents” document library, so I went to the “Site Content” page
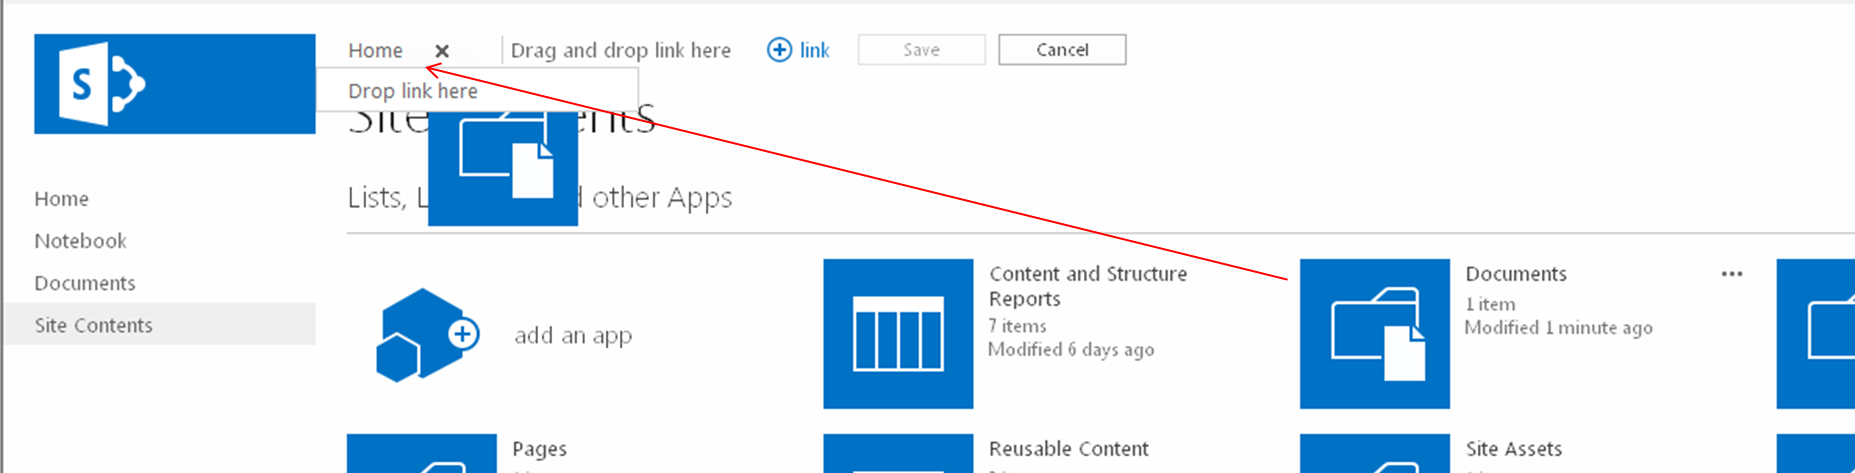
- You will see the “EDIT LINKS” link to the right of your global navigation, click the “EDIT LINKS” link (remember that you need to have full control on this site to see this link)
- You can add that item as a top level navigation item or as a child navigation item of an existing item
- To drop the item as a top level navigation item, drag and drop the item onto the “Drag and drop link here” text
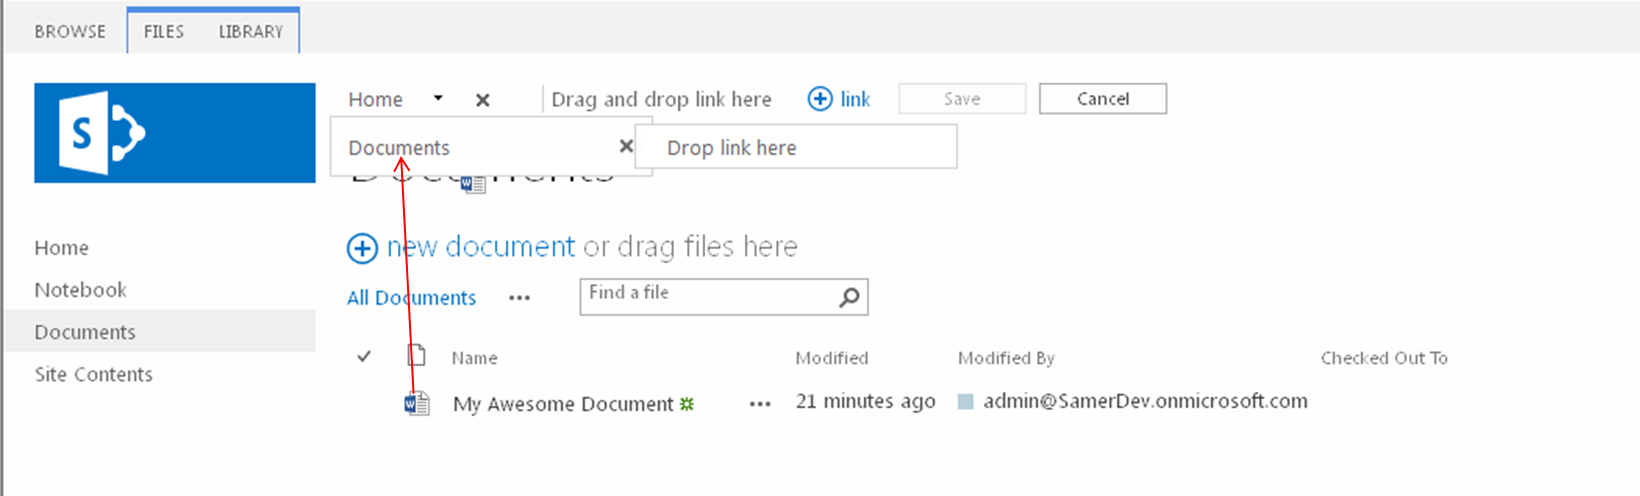
- To drop the item as a child of an existing item, drag and drop the item onto the existing item

- Click the Save button
- Repeat steps 2-5 until you have added all the items you want in your navigation
- Items can be any draggable objects in your SharePoint sites, so this includes Apps (including lists and libraries) and items (this includes list items, documents, and even people)
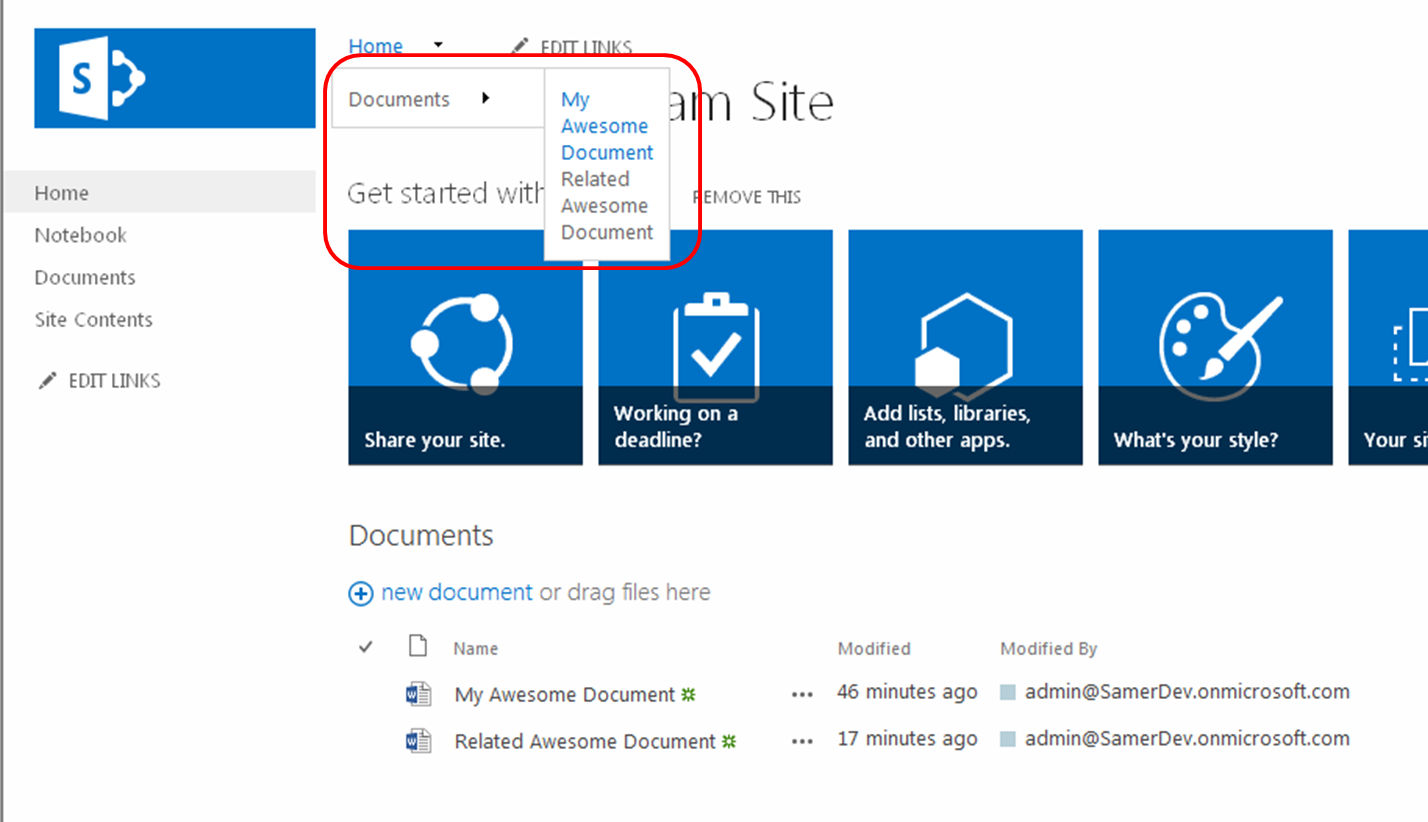
- For my example, I now opened the Document library and added the “My Awesome Document” under the Documents navigation item


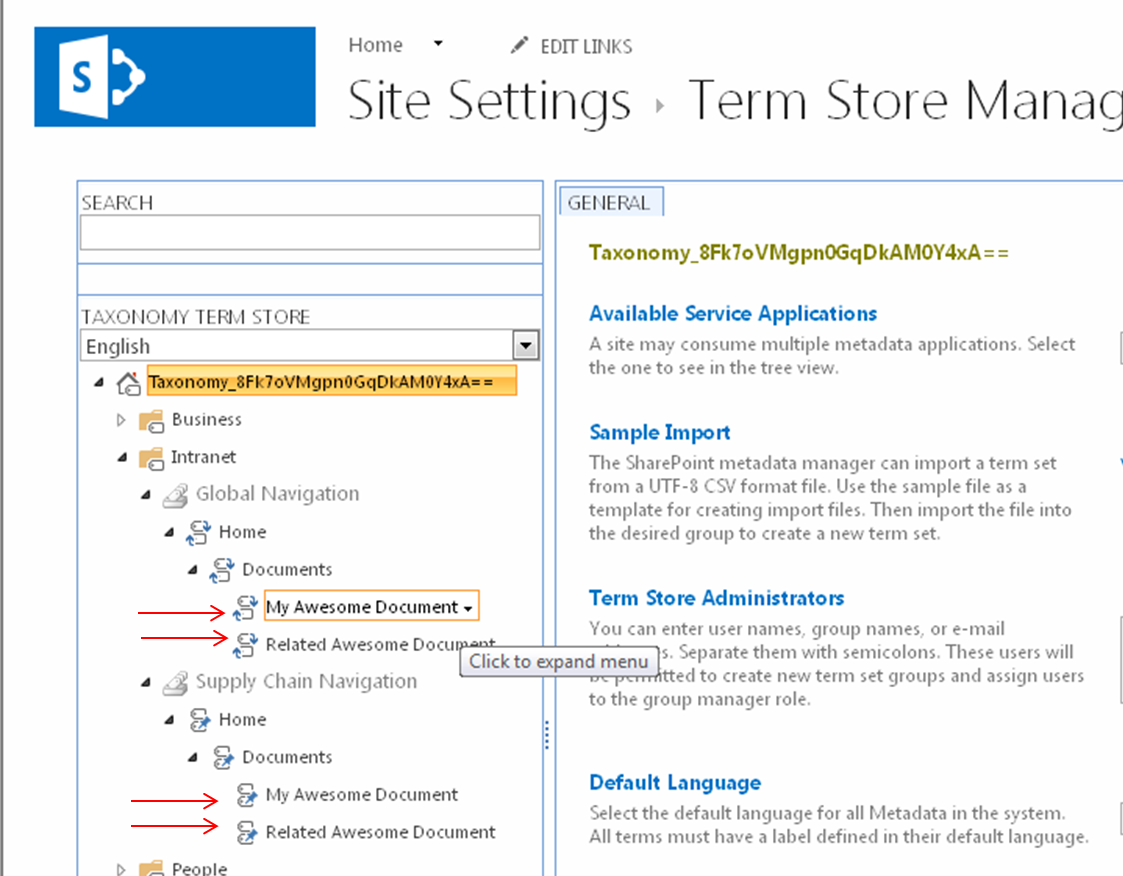
- Now if you go to the Term Store
- Site Actions > Site Settings
- Click Go to top level site settings [Site Collection Administration], if you are not on the root site collection
- Click Term store management [Site Administration]
- Click on a Term Group that you are using for your global navigation (my example in the screen shots below is called “Intranet”)

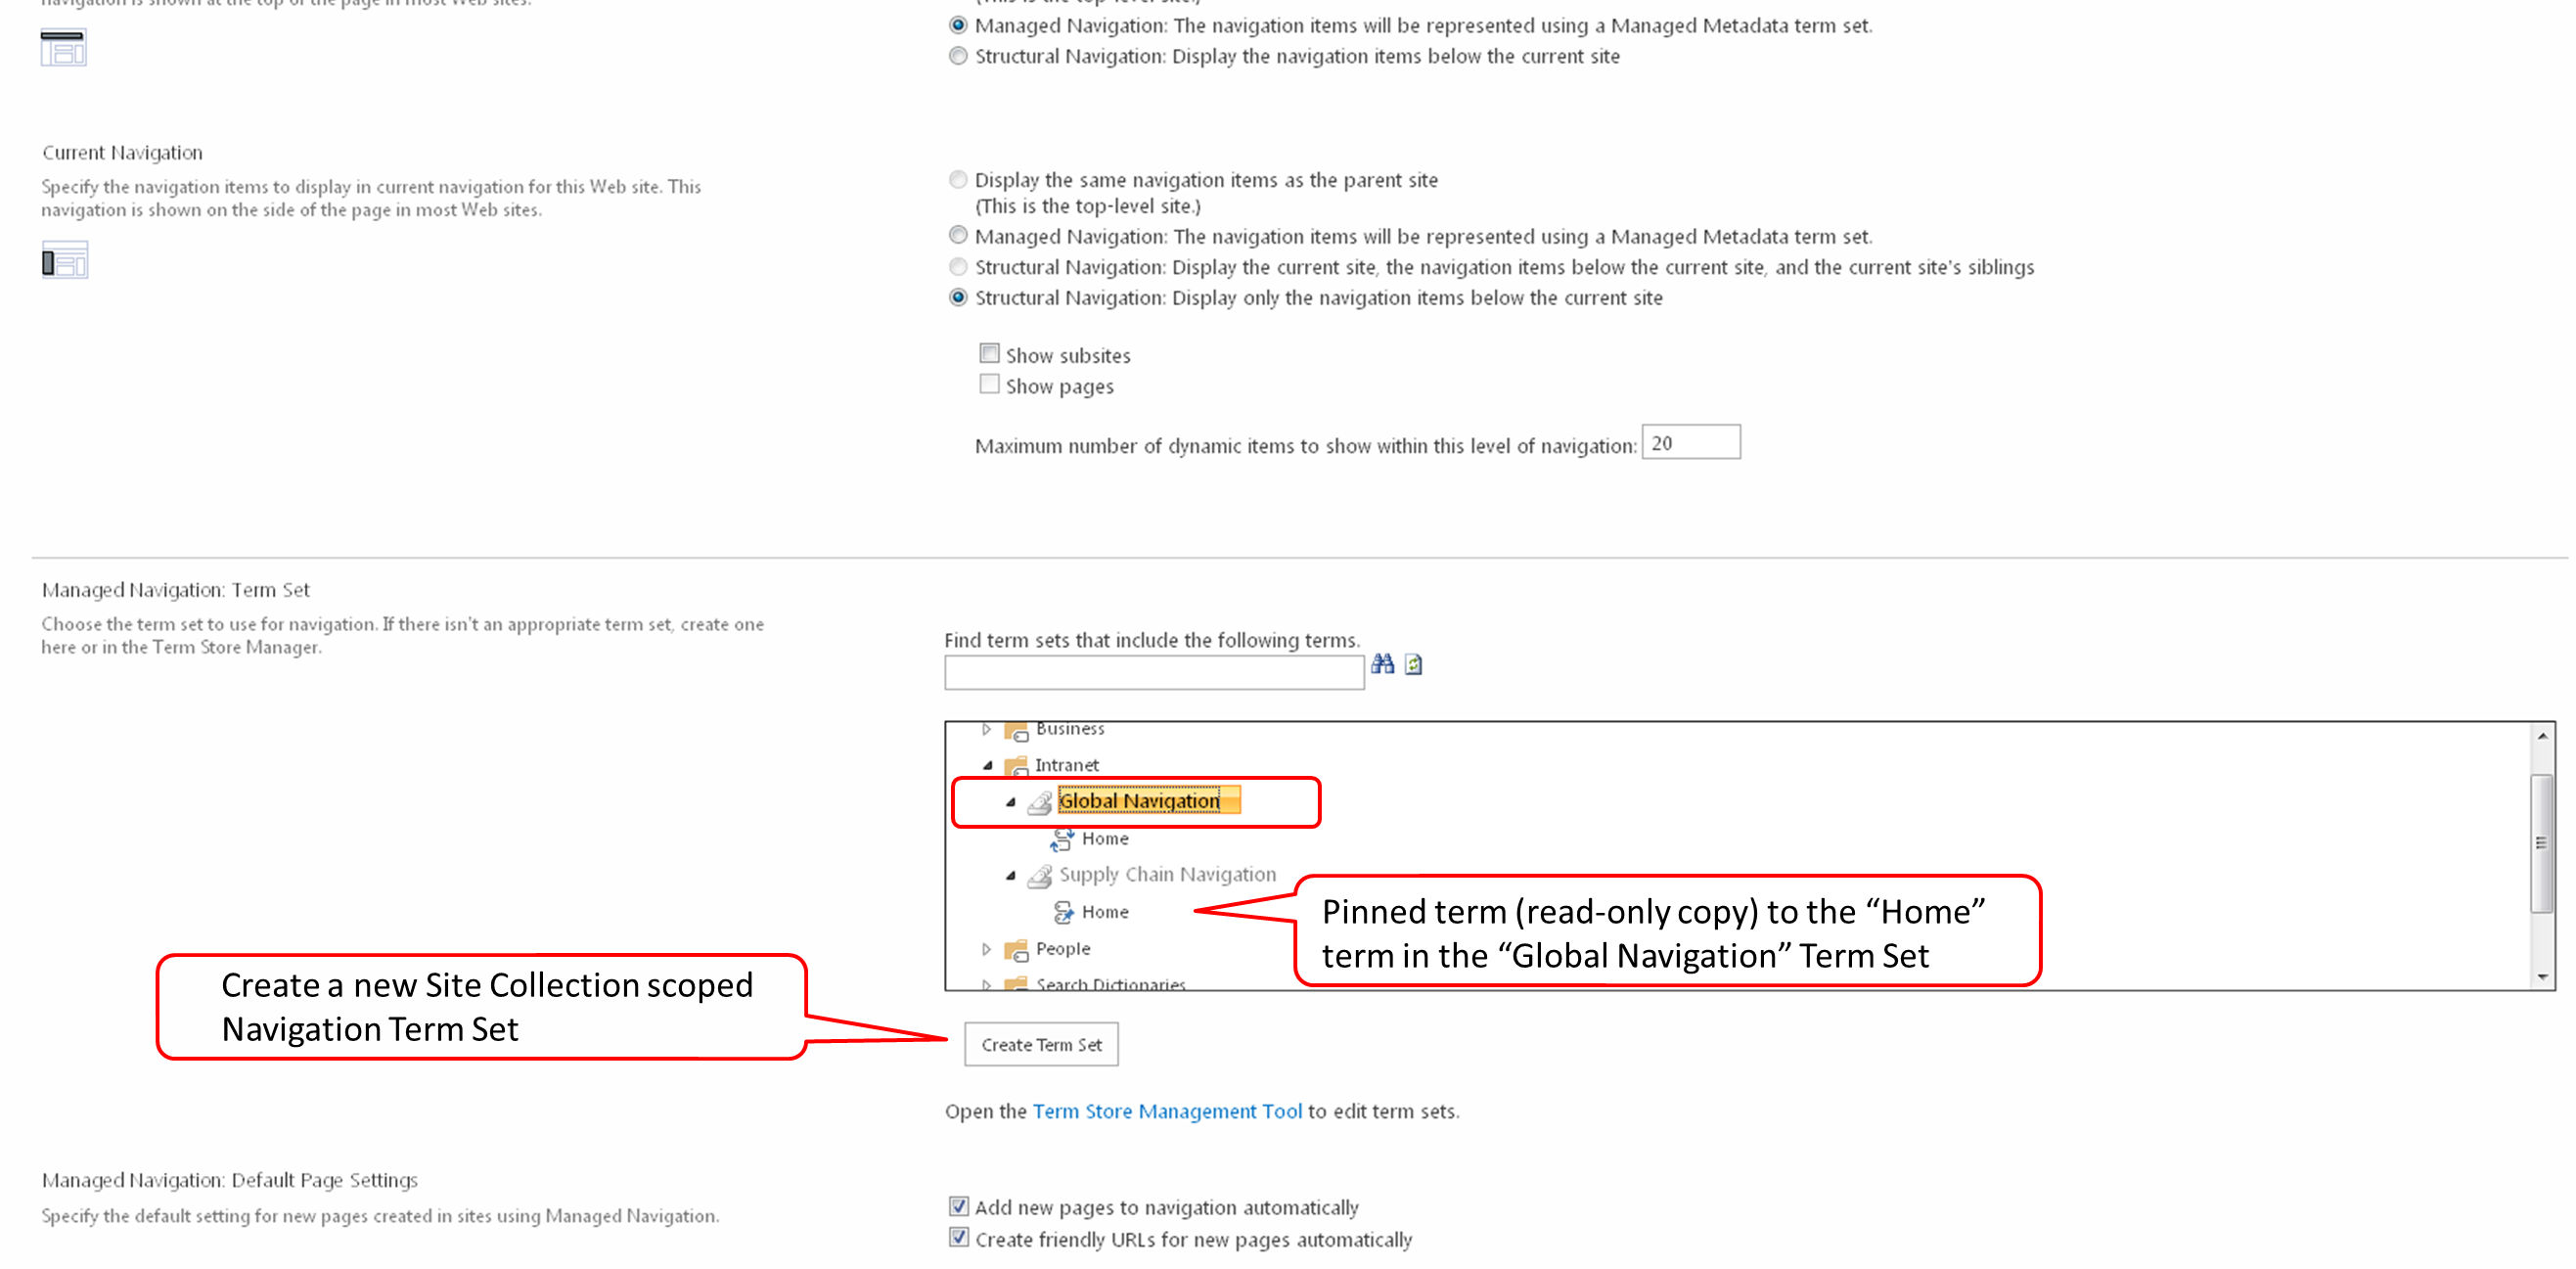
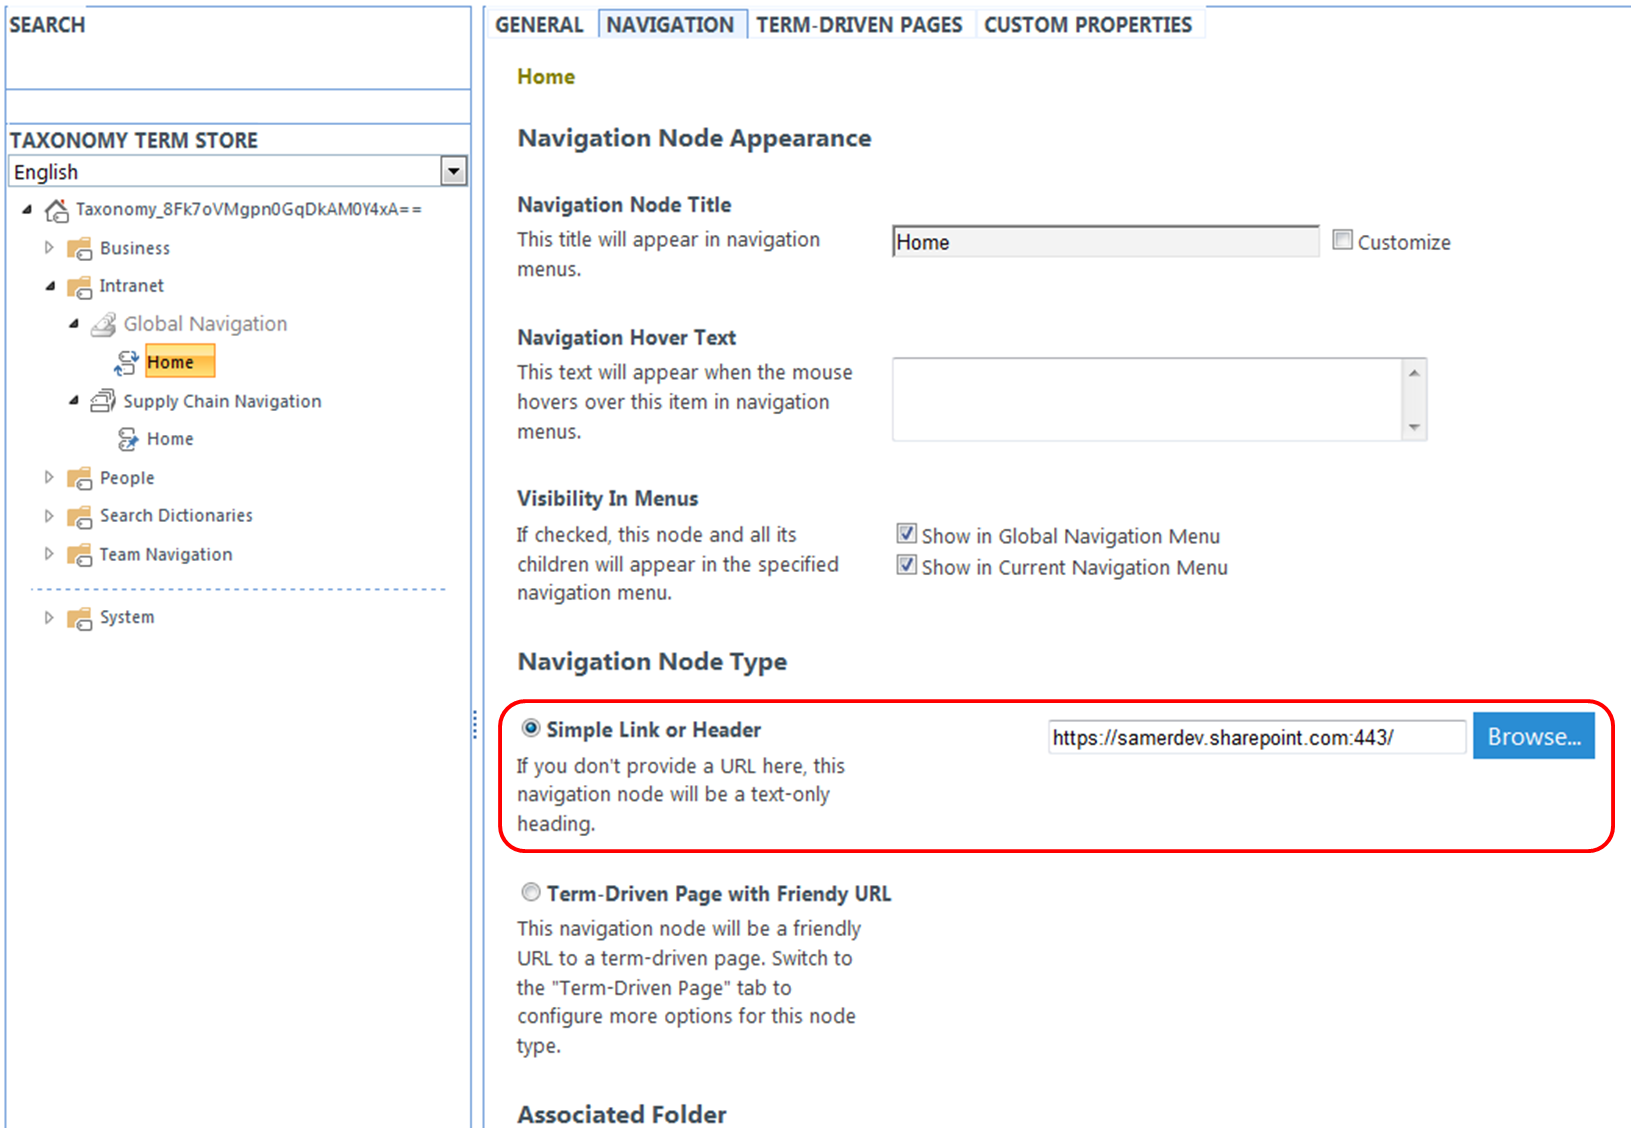
- As you can see, the navigation items that you have dragged and dropped are now terms under your global navigation Term Set. In addition, you will notice that any pinned terms to the source term that you added now also have pinned sub terms.
- Also notice that in the Term Store you can add more children terms under the navigation terms that were added. However anything beyond three levels will not show up in the global navigation, but can be used if you are intending to use this navigation Term Set for tagging content.
Drag and Drop Navigation
Reply